
Understanding Windows 11’s Default BitLocker Encryption
With the rollout of Windows 11 version 24H2, Microsoft has introduced automatic encryption of all drives upon setting up a new computer. Previously, BitLocker, a robust security feature, was exclusive to Professional editions. Now, even users of the Home edition will benefit from this encryption feature. However, the controversial aspect is that Microsoft does not provide an option for users to opt out of this security measure. As a result, many Windows 11 users are unaware that their drives have been encrypted, leading to numerous accounts of data inaccessibility and frustration.
What to Expect During Setup and Initial Sign-In
For individuals installing a fresh copy of Windows 11 version 24H2 or 25H2 without modifications, it is important to note that signing in with a Microsoft Account during the initial setup—or even later—will trigger automatic drive encryption. This development could catch former Windows 10 users off-guard, especially when transferring drives between different PCs. Fortunately, there are methods available to reverse this encryption. This guide will walk you through the process of disabling BitLocker on Windows 11.
Identifying BitLocker-Encrypted Drives
To determine if your drive is protected by BitLocker, follow these steps:
- Open File Explorer. If a small lock icon appears next to the drive’s icon, it indicates that the drive is encrypted.
- If locked, you’ll need to provide the BitLocker recovery key to access the contents. If the drive is unlocked, you can access it without entering any keys.

Steps to Disable BitLocker Encryption
Follow these steps to remove BitLocker from your drive:
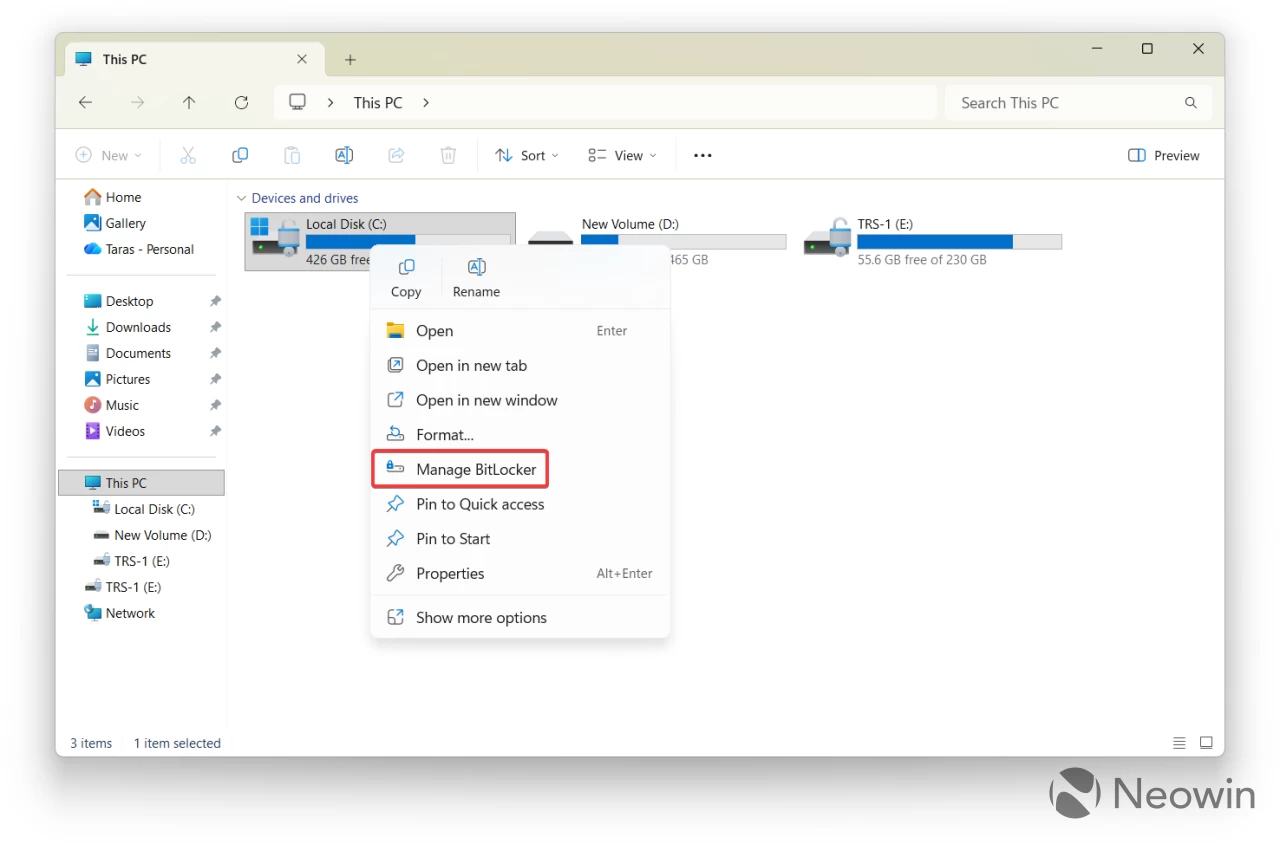
- Right-click the drive in File Explorer and select Manage BitLocker. This will redirect you to the Control Panel, where you can find a comprehensive list of drives and their BitLocker settings.
- Locate the drive you wish to decrypt and click on Turn off BitLocker. If the drive is currently locked, Windows 11 will prompt you to enter the BitLocker recovery key. If the key is linked to your Microsoft Account, it will unlock automatically; otherwise, you will need to manually enter it.
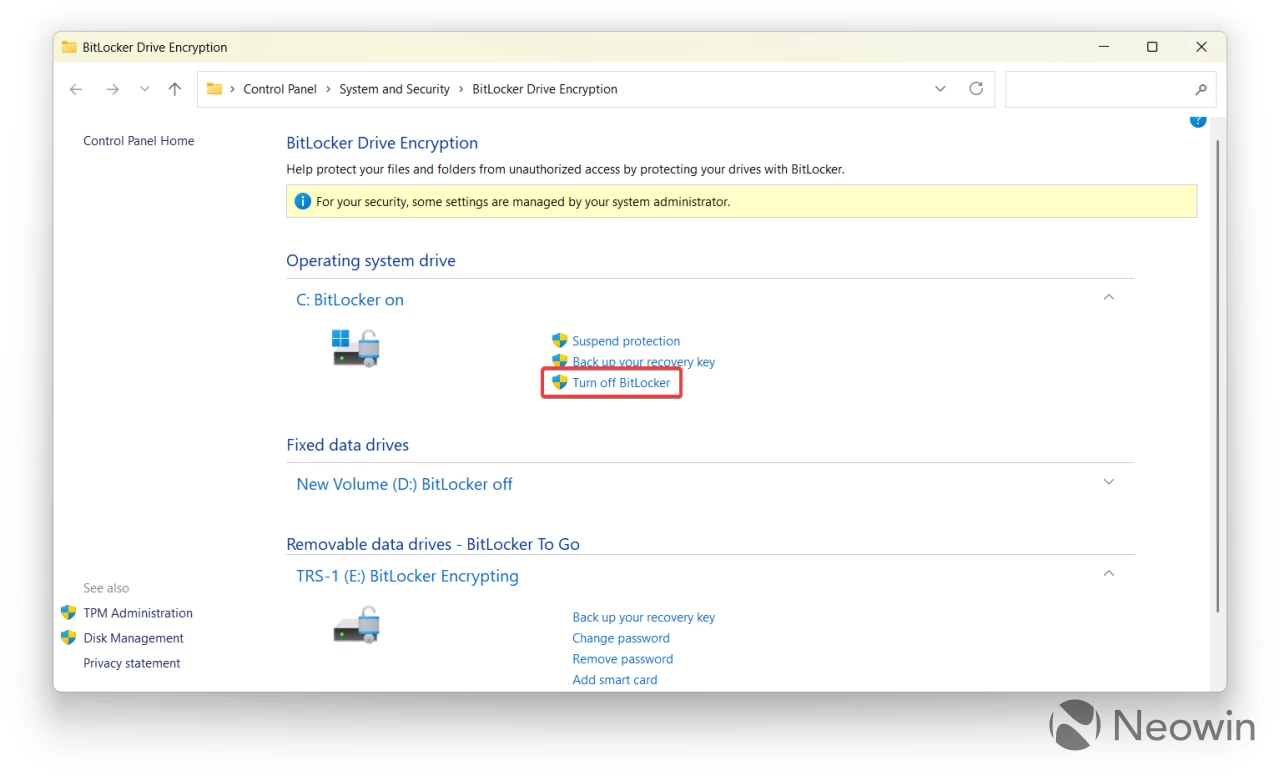
- Confirm the action by clicking Turn off BitLocker in the ensuing warning dialog. Depending on the size of the drive, the amount of stored data, and your CPU’s capabilities, this decryption process may take some time. You can continue using your computer during this operation—just keep it powered on.
These straightforward steps will effectively disable BitLocker encryption on Windows 11.
Preventing Automatic Drive Encryption on Clean Installations
If you’re planning a clean installation of Windows 11 and wish to bypass automatic drive encryption, follow these steps to create a USB installation drive with BitLocker disabled using Rufus:
- Download Rufus from its official website.
- Download the Windows 11 ISO from Microsoft’s site.
- Run Rufus, select your USB drive, and choose the downloaded ISO. Keep the other settings unchanged.
- Click Start. In the dialog box that appears, check the option for Disable BitLocker automatic drive encryption and click Ok.

- Allow Rufus to create your Windows 11 installation media. After completion, use it to perform a clean installation of Windows 11 as usual.
After following these steps, you will have a freshly installed version of Windows 11 without the encumbrance of BitLocker encryption.
Related Articles:

Microsoft Acknowledges Backlash and Commitment to Improve Windows
1:41
Microsoft Addresses Backlash from Windows 11 AI OS Power Users: ‘We Care Deeply About You’
23:36
Windows 11 Copilot Advertisement Accidentally Reveals AI Struggling with Basic Text Size Adjustment
21:35
Leave a Reply