
UPDATE: We have embedded an interactive map to assist you in locating all pieces of the Glide Armor and their corresponding trials in Zelda: Tears of the Kingdom.
The Glide Armor Set in Zelda: Tears of the Kingdom
The Glide Armor set features prominently in Zelda: Tears of the Kingdom, even for players who aren’t particularly keen on skydiving. This armor set is designed to eliminate impact damage, providing significant benefits not only during sky diversions but also in scenarios where you might accidentally tumble from a height.
In order to obtain each piece of this coveted armor, you must complete specific skydiving challenges set by Steward Constructs, which are often situated on islands that can be easy to overlook.
Where to Find the Glide Armor in Tears of the Kingdom
For a comprehensive guide on the precise locations of each trial essential for acquiring the Glide Armor set, refer to our interactive map. Detailed instructions on how to successfully complete each trial follow below.
Location of the Glide Shirt
Your journey to claim the Glide Shirt begins on Courage Isle, located on the western side of the Central Hyrule Archipelago. Launch yourself into the sky from the Lindor’s Brow Skyview Tower, then glide southwest until you spot the island perched above the prominent spiral formation.

Initially, you’ll engage in a practice trial. Touch the Zonai hand symbol, dive strategically through the rings, and land safely in the nearby pool. After activating the shrine, converse with the Steward Construct. You’ll need to present one Zonai Charge to commence the challenge, which requires completion in under 30 seconds. This generous time limit enables you to navigate without rushing until the final stretch.
Should you finish in less than 25 seconds, you’ll receive a snarky remark from the Construct, but don’t worry—they’ll still reward you with the Glide Shirt. You may reenact the challenge for an additional Zonai Charge, with a completion time of under 25 seconds granting you a Large Zonai Charge.
Location of the Glide Mask
As with the shirt, you’ll find a shrine on Valor Island—make sure to activate it. Once you’ve completed the practice trial, land in the designated pool, and talk to the Steward. Presenting a Zonai Charge will allow you to officially start the trial, which you must finish in under 30 seconds to obtain the armor piece.
Location of the Glide Tights
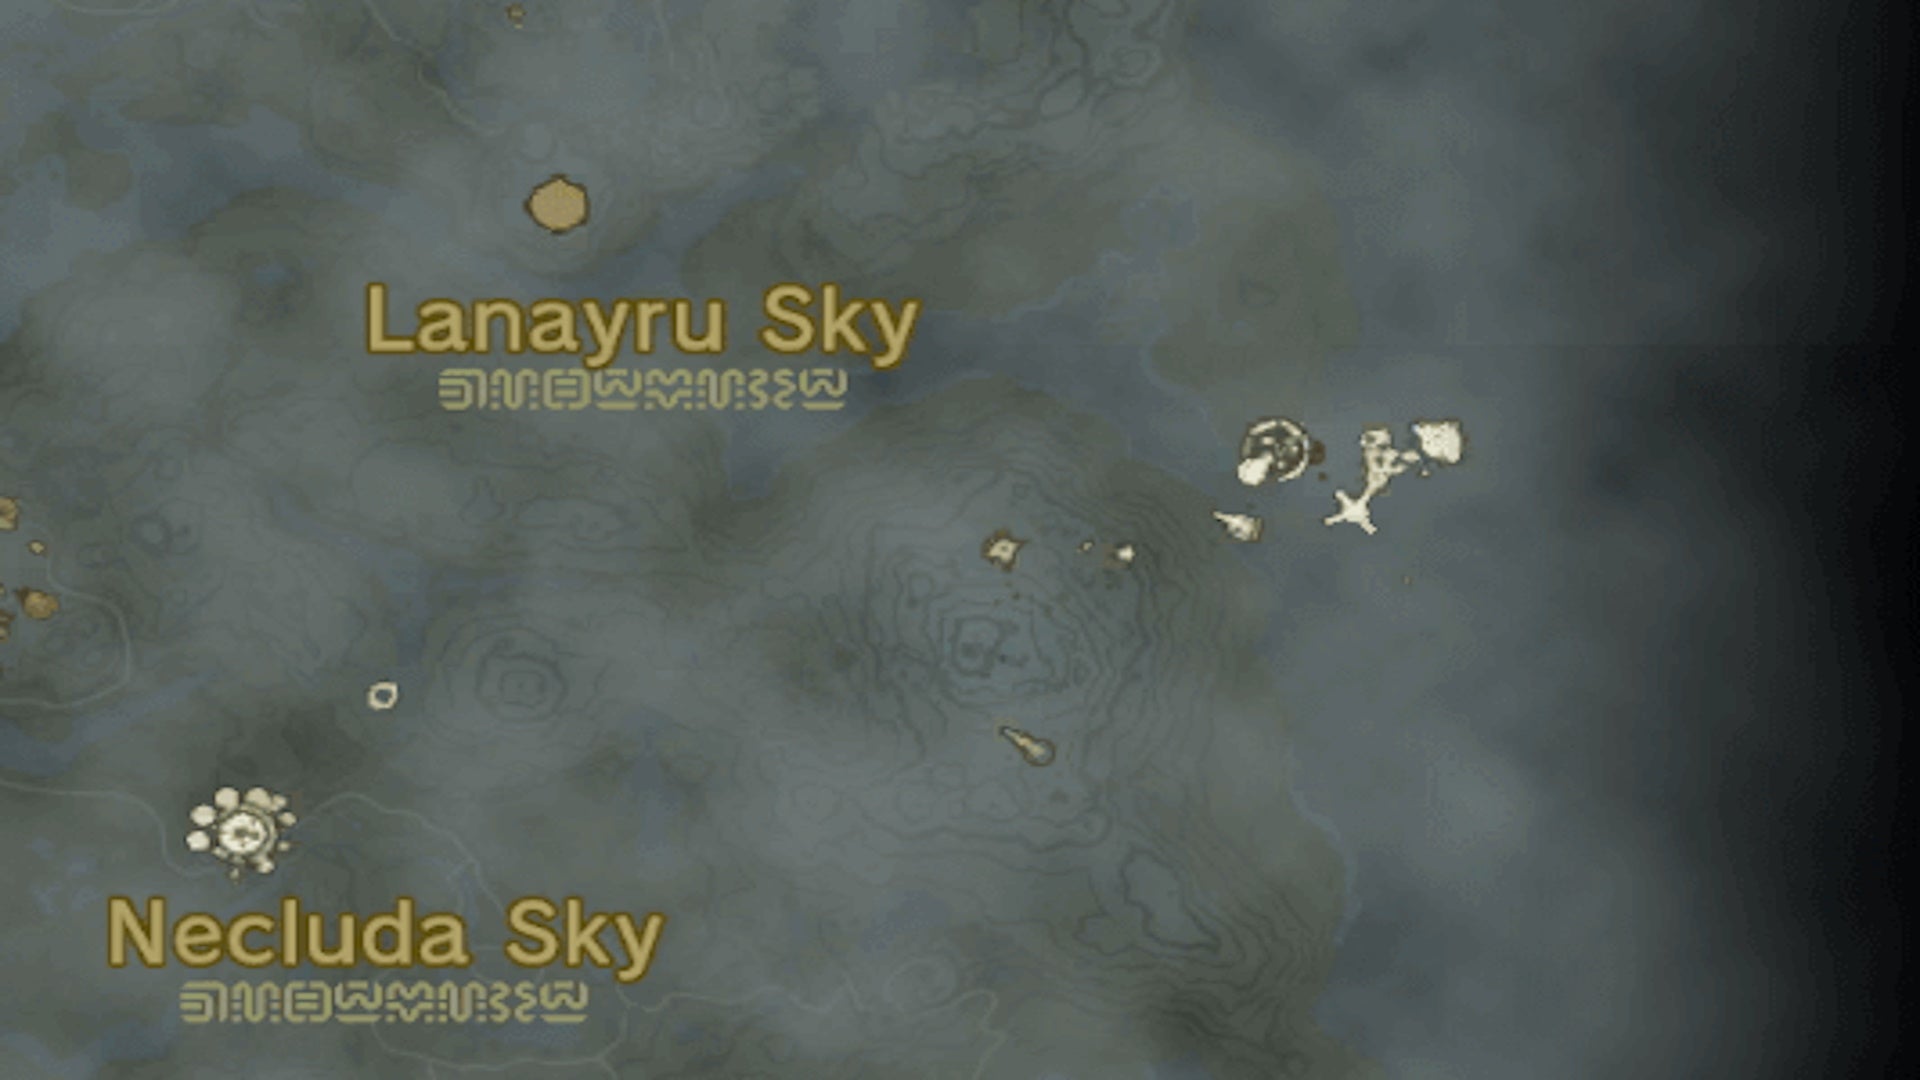
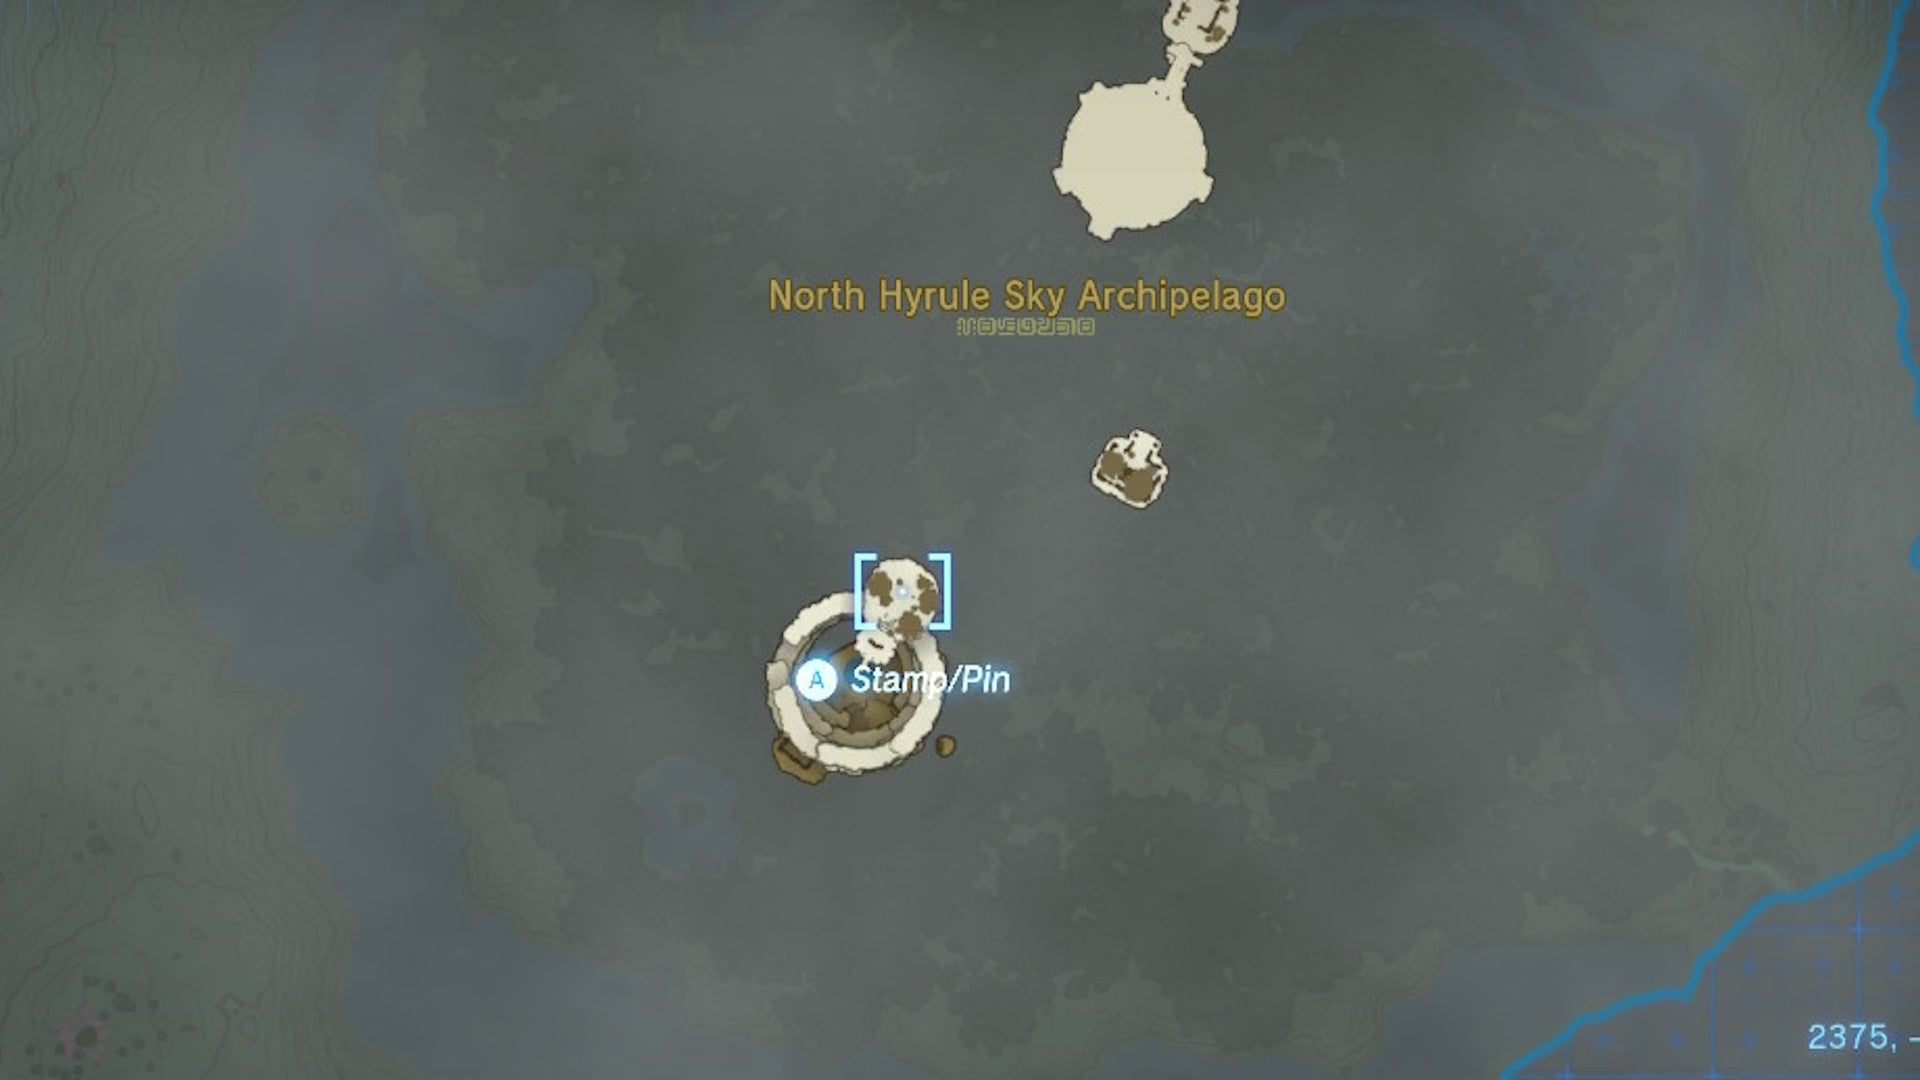
To find the Glide Tights, head to Bravery Island, which is located on the northern edge of the map within the North Hyrule Archipelago. Use the Skyview Tower located north of the Lost Woods, glide southward towards the island. Due to the distance, it might be necessary to consume a stamina-enhancing meal or elixir.
Engage with the Steward Construct, provide a Zonai Charge, and complete the challenge within the allotted time.
Is Investing in the Glide Armor Worth It?
The Glide Armor significantly enhances your gliding experience, allowing for greater maneuverability while covering more ground without needing to deploy the paraglider. However, the real advantage lies in upgrading the armor. After two upgrades to each piece, you’ll gain the notable Impact Proof perk, which protects you from any fall damage.
To reach this upgrade level for all three pieces, gather the following materials:
- 24 Cheese Wings
- 18 Aerocuda Eyes
Keep in mind, to perform any upgrades, you’ll need to recruit the Great Fairies. While you’re at it, consider exploring what Bubbul gems can offer, hunting for Geoglyphs, completing the Lucky Clover Gazette quests, or tracking down all Skyview Towers scattered throughout Hyrule.


Leave a Reply