
Upcoming Release of Windows 11 Version 25H2: What You Need to Know
The much-anticipated Windows 11 version 25H2 is nearly upon us, with Microsoft already hosting ISO and enablement packages on its servers. For current users of Windows 11, this update may seem relatively uneventful, particularly for those upgrading from earlier versions. Because version 25H2 is part of the same branch as the preceding version 24H2, the transition will be both effortless and swift. However, the upgrade process for users with unsupported devices is a different story, as they face additional challenges when attempting to install this new version.
Installing Windows 11 Version 25H2 on Unsupported Devices
Important Note: Unfortunately, there’s no method to bypass hardware limitations for computers with processors that do not support SSE4.2 instructions. For these older systems, the only compatible versions are Windows 11 23H2 or earlier. Therefore, devices lacking this support will not be able to run versions 24H2, 25H2, or newer releases.
Upgrading to Windows 11 Version 25H2
If your device is currently running Windows 11 version 24H2, you won’t need to take any action as the update to version 25H2 will be delivered seamlessly through a cumulative update. You’ll gain access to all new features available in version 25H2 without requiring any additional steps. For those who wish to see “25H2″listed in their Settings > System > About, the enablement package outlined in this guide is available for use.
Conversely, for users still on Windows 10 who wish to upgrade to version 25H2, the process is slightly more complex. Simply utilizing an ISO or pressing a button will not suffice. However, many of the methods discussed for Windows 11 version 24H2 remain applicable.
Step-by-Step Installation Instructions
- Download the Windows 11 version 25H2 image and mount it on your system.
- Navigate to the mounted ISO and open the sources folder.
- Hold down the Shift key, right-click in an empty space, and choose Open PowerShell here.
- Enter cmd into the PowerShell window and hit Enter.
- Execute the command
setupprep.exe /product serverand press Enter.
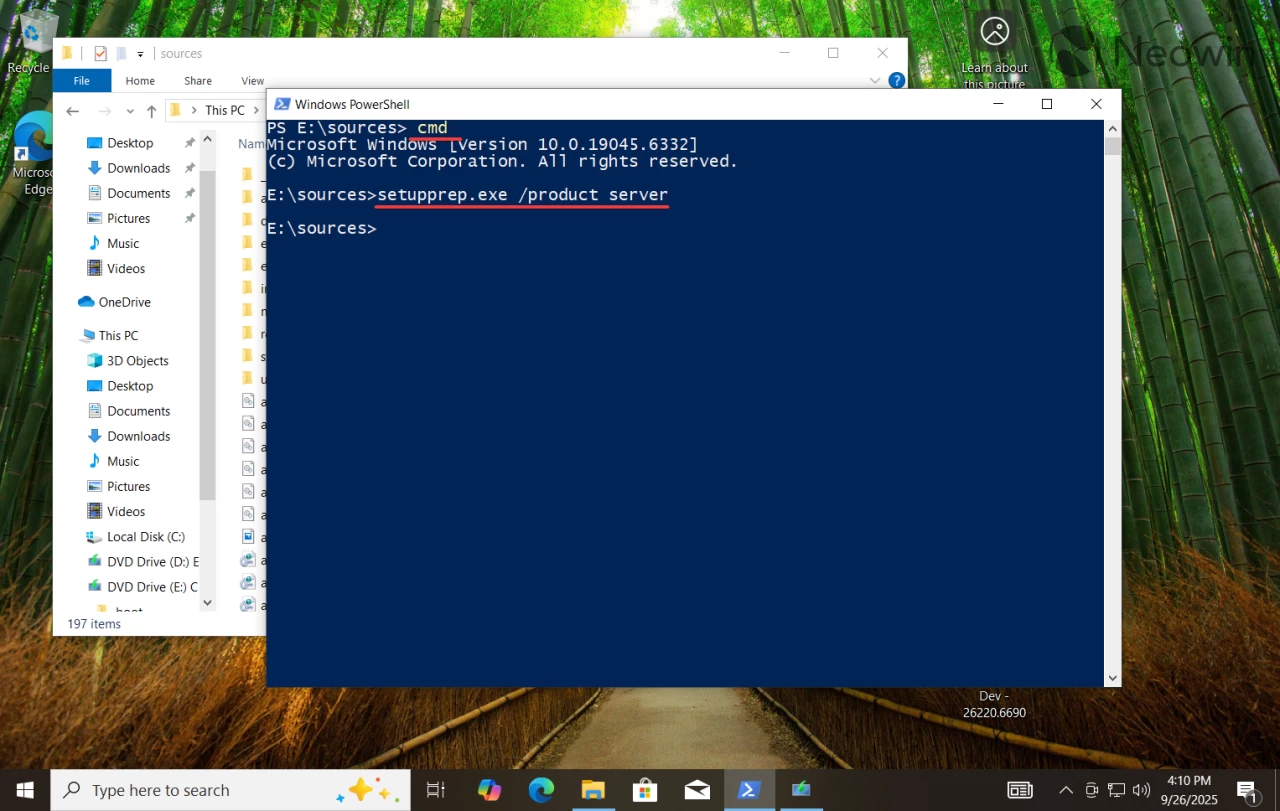
Note: This command tricks the system into recognizing that you are installing Windows Server, consequently bypassing hardware checks. Fear not, you’ll still end up with either the regular Home or Pro edition, depending on what you currently have; the command is solely for the purpose of circumventing those requirements.
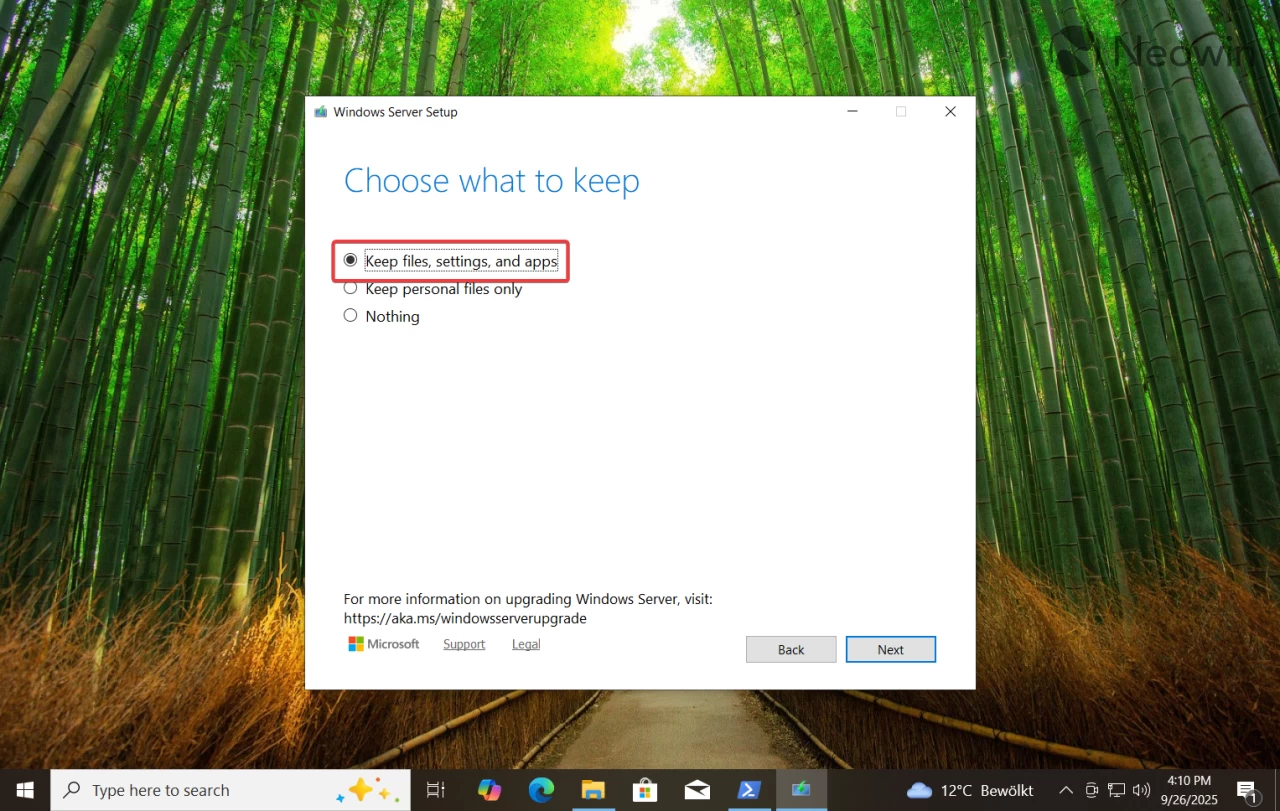
- Follow the prompts on-screen and choose the relevant option on the “Choose what to keep“page. If you prefer to keep your system settings intact, select the first option.
- After confirming your selections, relax as Windows 11 installs.
That’s it! You are now running a fresh installation of Windows 11 version 25H2 without needing to alter system registries or employ third-party applications. For those interested, a small utility offers a more user-friendly interface to carry out the same process without having to dive into PowerShell or enter numerous commands.
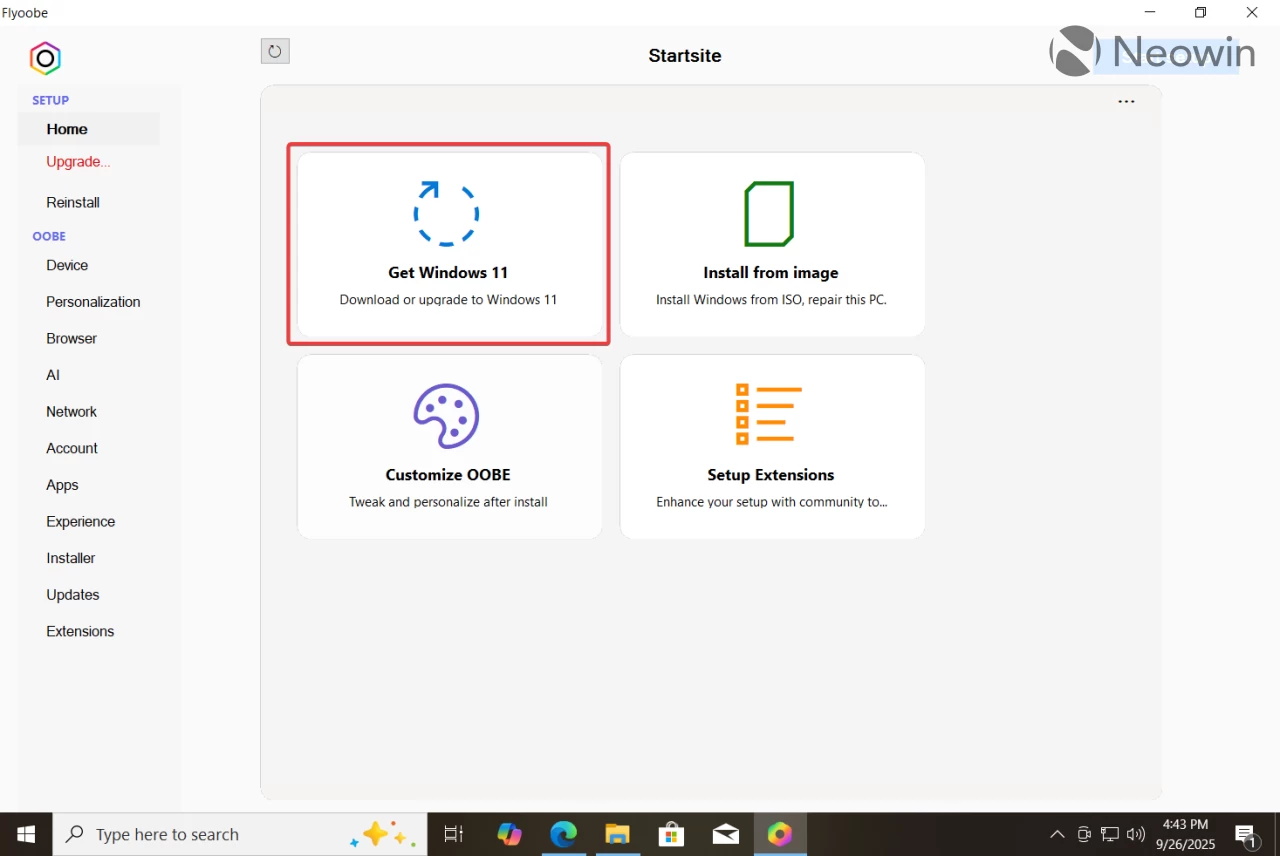
Using the Flyoobe App for Installation
- Access Flyoobe’s GitHub page to download the app. Obtain the latest release and extract it to a suitable location.
- Launch the Flyo application and click on Get Windows 11.
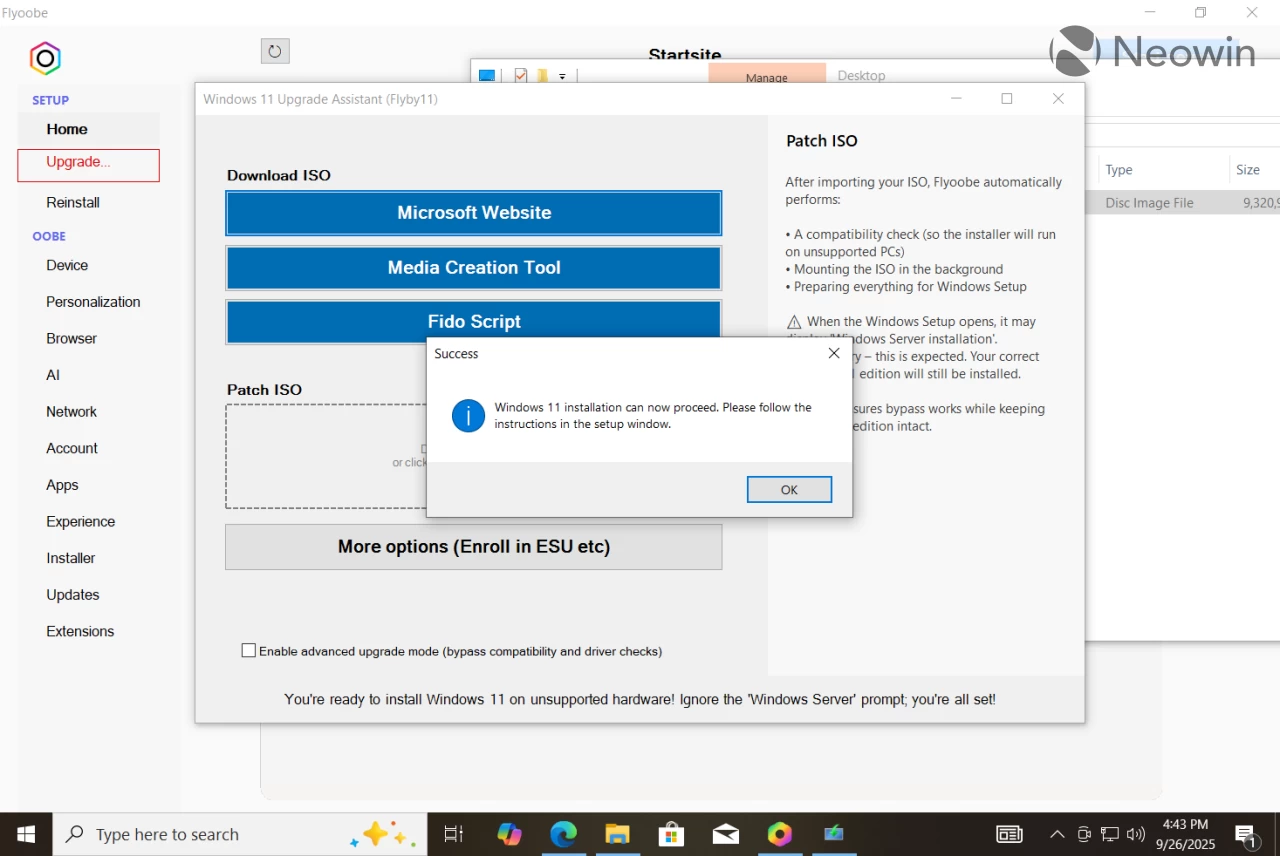
- Download the Windows 11 version 25H2 ISO and drag it to the Patch ISO section.

- Flyoobe will automatically execute the required scripts to bypass hardware checks, initiating the installation wizard for upgrading to Windows 11 version 25H2.
Performing a Clean Install of Windows 11 Version 25H2
For users considering a clean installation of Windows 11 version 25H2 on unsupported hardware, the tool Rufus is invaluable. This widely-used utility allows you to create a bootable USB drive while bypassing specific hardware requirements and other limitations, including the necessity of a Microsoft Account.
- Visit the Rufus official website to download the installer or the portable version.
- Run the downloaded application and let it check for updates.
- If you lack the Windows 11 25H2 ISO file, click the down arrow next to the Create button and choose Download. You will be prompted to select the version, language, and edition of Windows. Choose your preferences and let Rufus complete the download.
- Insert a USB drive (8GB or more) and select it from the Device dropdown menu.
- Choose “Disk or ISO image“and click Select.
- Locate the downloaded Windows 11 25H2 image and leave the rest of the settings as is.
- Click Start.
- Here comes the critical step: Check the box for “Remove requirement for 4GB+ RAM, Secure Boot, and TPM 2.0.”Additionally, you can customize other options like disabling BitLocker and creating a local account.

- Wait for Rufus to write the ISO file to your USB drive.
- Once complete, you can proceed with installing Windows 11 25H2 on your unsupported device, or alternatively, access the USB drive and click setup to perform an in-place upgrade.
And there you have it! You are now equipped with the knowledge to install Windows 11 version 25H2 on unsupported hardware with ease.
Related Articles:

Download Chrome via Bing? Microsoft Incentivizes Windows 11 Users to Switch to Edge with Gift Cards
18:53
Microsoft PowerPoint Eliminates “Reuse Slides” Feature on Windows & macOS While Integrating New Copilot Tools
14:29
Halo Infinite Support Concludes After Four Years, Studio Redirects Efforts to Upcoming Games
1:42
Leave a Reply