
Harnessing the power of AutoHotkey (version 2) has transformed the way I engage with Windows on my PC. After years of manually running PowerShell scripts, I’ve integrated AutoHotkey to bind them seamlessly to keystrokes, creating a user experience reminiscent of hidden features that Microsoft didn’t prioritize. This guide will help you unleash productivity with custom scripts designed to streamline your workflow.
10 My Personal Quick App Launcher

I often find that essential tools like Notepad, Calculator, and Paint remain buried under an ocean of desktop icons or hidden in the Start menu. To alleviate this, I’ve crafted a custom menu that springs to life with Windows Key + M, allowing instant access to my favorite applications without the tedious search.
#Requires AutoHotkey v2.0 m::{ MyMenu: = Menu() MyMenu. Add("Calculator", (*) => Run("calc.exe")) MyMenu. Add("Sticky Notes", (*) => Run("explorer.exe shell:AppsFolder\Microsoft. MicrosoftStickyNotes_8wekyb3d8bbwe!App")) MyMenu. Add("Notepad", (*) => Run("notepad.exe")) MyMenu. Add("Paint", (*) => Run("mspaint.exe")) MyMenu. Show() }
The beauty of this script lies in its customizability. For instance, if you wish to add an application like Notion, simply duplicate an existing line, rename it, and input the corresponding path. This launcher saves me time throughout the day, eliminating those little moments of frustration that can accumulate into a significant waste of effort.
9 Consistent Horizontal Scrolling
Regularly using horizontal scrolling can be a hassle when it doesn’t function consistently, especially in apps important for viewing code snippets or creating designs. Fortunately, I developed a simple script to ensure horizontal scrolling operates as intended across all applications.
Create your own horizontal scrolling script using the following code:
#Requires AutoHotkey v2.0 #HotIf GetKeyState("Shift", "P") WheelUp::Send("{WheelLeft}") WheelDown::Send("{WheelRight}") #HotIf
This allows you to hold Shift while using your mouse wheel to easily scroll sideways—useful in everything from Excel spreadsheets to web design tools.
8 Instant Access to Any Folder
Managing a plethora of folders can complicate access, especially when in a rush. To address this, I devised a script that opens a specific folder compartment with a simple key combination of Ctrl + ALT + D.
#Requires AutoHotkey v2.0 ^!d::Run('explorer.exe "C:\Users\jricm\Downloads"')
Feel free to modify the path in the script to point to your desired folder. I’ve tailored variations for my Desktop, Documents, and other project-specific repositories, granting me instant access with ease.
7 Quick Text Expansions for Everyday Phrases
Aiding communication efficiency, I’ve explored the potential of quick text expansions. With a straightforward AHK script, I can insert common phrases swiftly and without fuss.
#Requires AutoHotkey v2.0 #SingleInstance Force::gm::Good morning::ty::Thank you::brb::Be right back
By typing shortcuts like “gm”followed by a space, it transforms into “Good morning”instantly. This capability enhances my communication flow and is particularly helpful for responding to messages effectively.
6 Custom Volume Control for My Keyboard

Controlling volume on Windows can often feel cumbersome. To simplify this, I implemented custom shortcuts incorporating CTRL + Comma for volume down and CTRL + Period for volume up.
#Requires AutoHotkey v2.0 #SingleInstance Force ^, ::Send("{Volume_Down}") ; Ctrl + Comma ^.::Send("{Volume_Up}") ; Ctrl + Period ^m::Send("{Volume_Mute}") ; Ctrl + M
These shortcuts are not only easy to remember but also readily accessible, allowing quick adjustments while maintaining focus on work. Plus, the volume overlay mimics the functionality of dedicated volume controls.
5 Centering Your Mouse Cursor Instantly
Finding your mouse cursor can be challenging when using multiple monitors. To resolve this, I’ve developed a script that centers the cursor with a tap of Ctrl + Alt + C.
#Requires AutoHotkey v2.0 ^!c:: { WinGetPos(&x, &y, &w, &h, "A") MouseMove(x + w/2, y + h/2) }
This script allows for quicker navigation between applications by centering the cursor on the active window, even if partially off-screen. Adapt it to move the cursor to specific locations if needed.
4 Auto-Organizing Downloads Folder
-
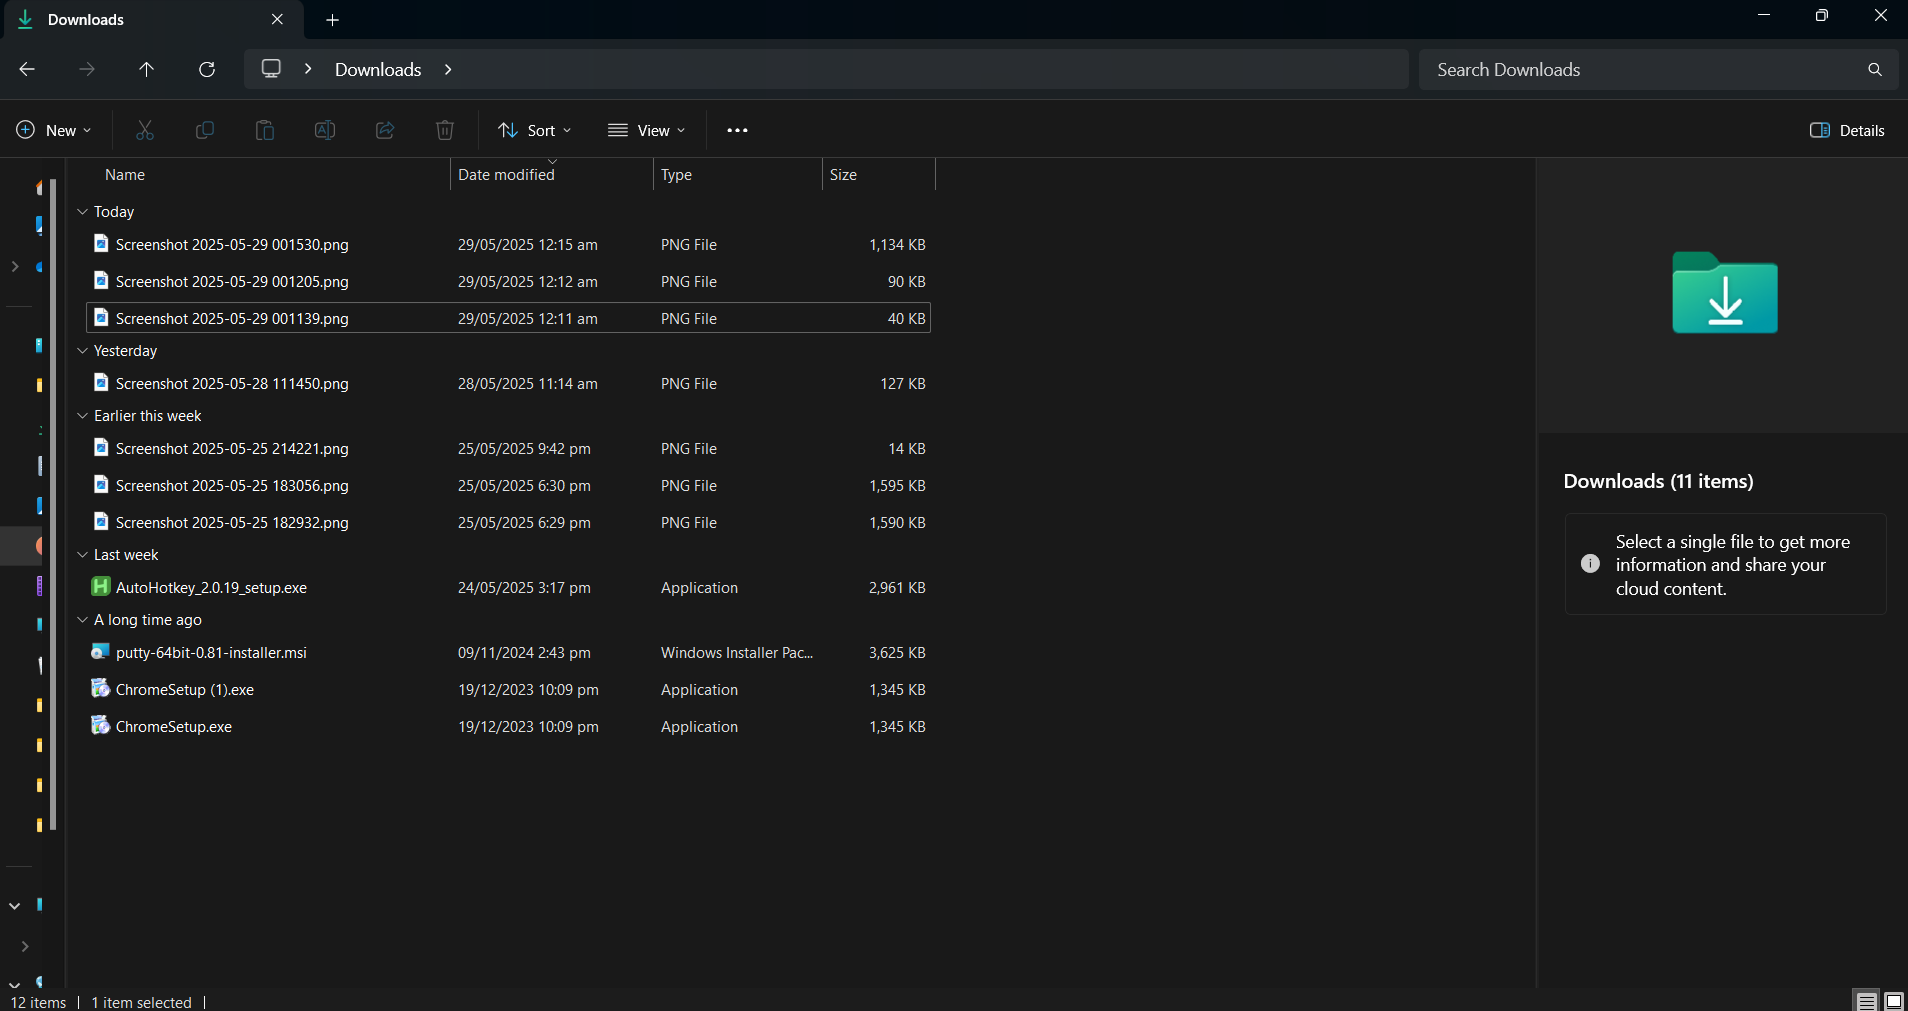
Before
-
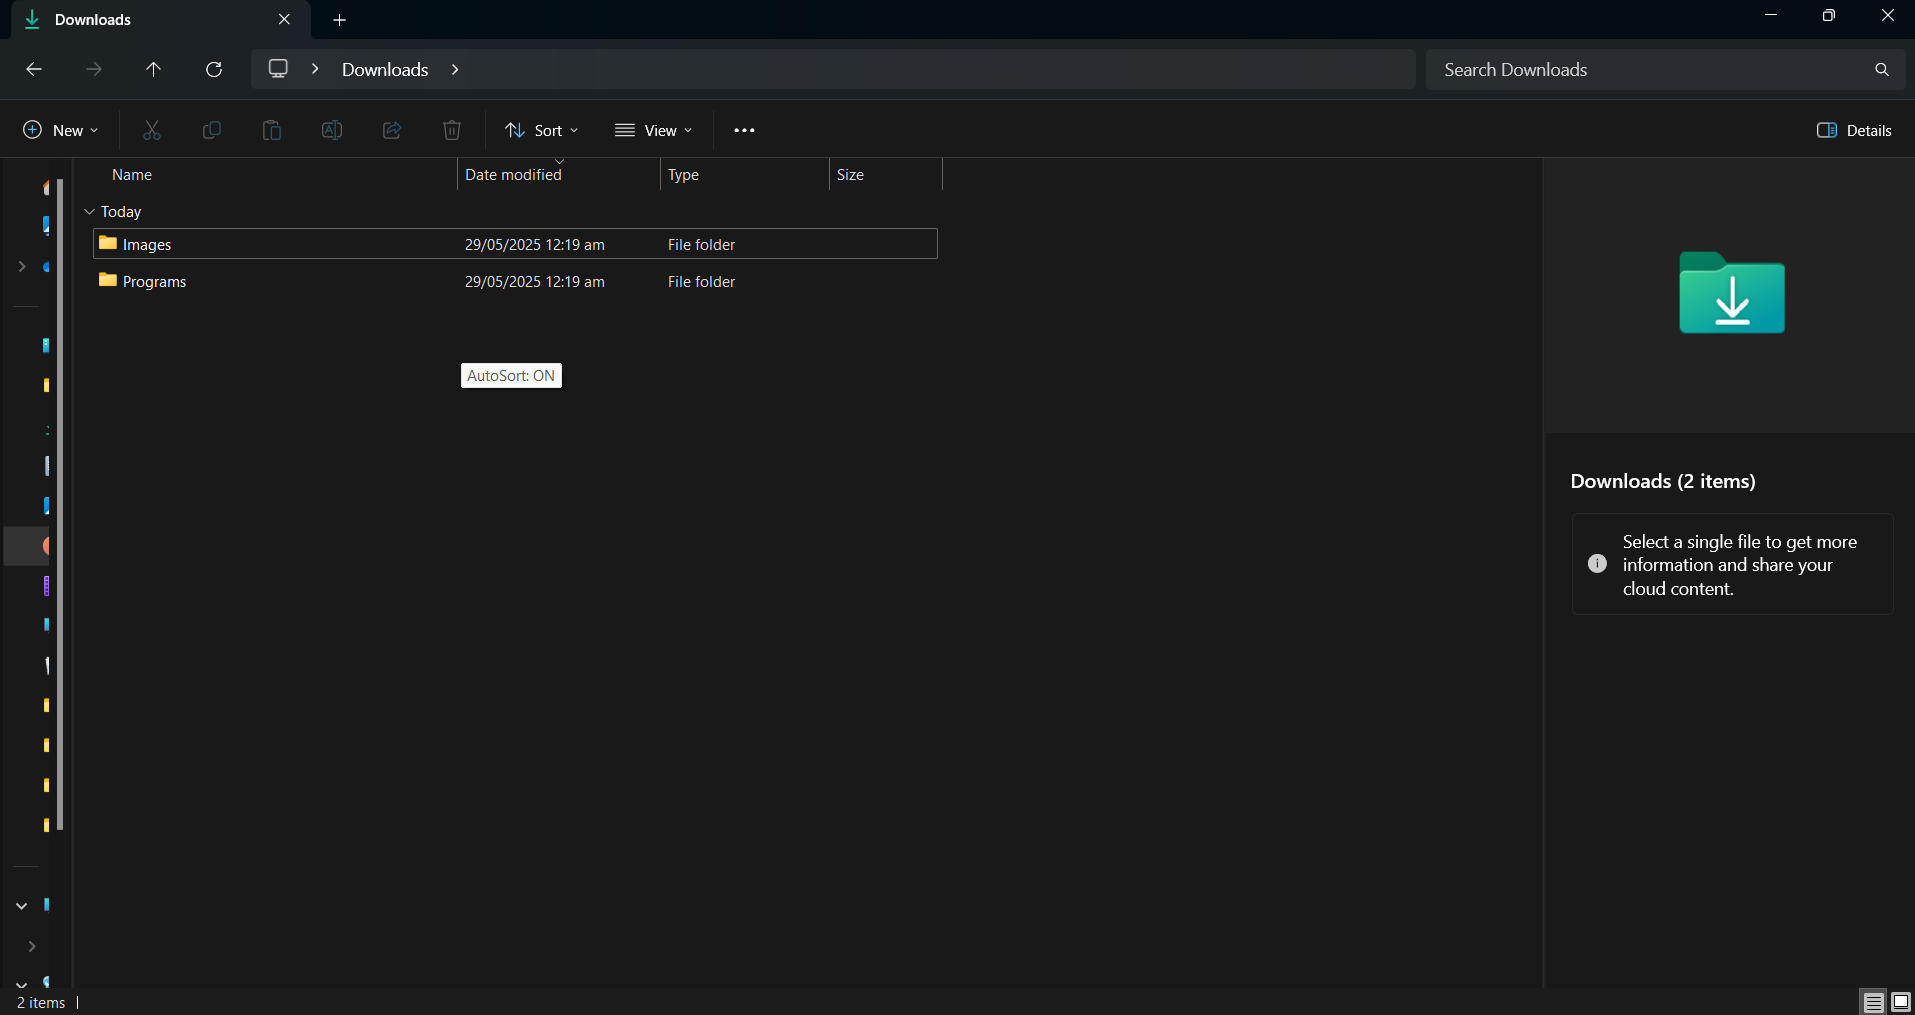
After
The unregulated chaos of my Downloads folder once overwhelmed me—files scattered everywhere. To address this, I devised a script that autonomously organizes incoming files by type. Triggered by a tap on F12, it scans and categorizes downloads at five-second intervals.
#Requires AutoHotkey v2.0 downloads:="C:\Users\jricm\Downloads", interval:=5000 ext:=Map("pdf", "Docs", "docx", "Docs", "xlsx", "Docs", "txt", "Text", "jpg", "Images", "png", "Images", "mp3", "Music", "mp4", "Videos", "exe", "Programs", "zip", "Archives") F12:: { static on:=false on:=!on, SetTimer(MoveFiles, on?interval:0) ToolTip("AutoSort: "(on?"ON":"OFF")) SetTimer(() => ToolTip(), -1500) } MoveFiles() { Loop Files downloads "\*.*", "F" if ext. Has(e:=A_LoopFileExt) { d:=downloads "\"ext[e] if! DirExist(d) DirCreate(d) try FileMove(A_LoopFilePath, d "\"A_LoopFileName, 1) } }
This script is beneficial, as it automatically creates folders as needed and avoids file overwrites. A simple tooltip also indicates whether auto-sorting is active, streamlining the organization process.
3 Launching Multiple Apps for Specific Workflows
AutoHotkey’s versatility shines through in managing workflows. For instance, with Windows Virtual Desktops, I desired to launch multiple applications simultaneously using a single hotkey.
#Requires AutoHotkey v2.0 +1:: { Run('"C:\Users\jricm\AppData\Local\Programs\Microsoft VS Code\Code.exe"') Run('"C:\Program Files\JetBrains\DataGrip 2023.3.4\bin\datagrip64.exe"') Run('"C:\Program Files\Docker\Docker\Docker Desktop.exe"') }
With Shift + 1, multiple applications launch at once, freeing me to engage with other tasks while they load. I’ve established various scripts for different workflows, making switching contexts seamless and efficient.
2 Keeping Important Windows Always Visible
Maintaining visibility of certain windows is paramount during tasks such as tutorials or collaborative discussions. Unfortunately, Windows lacks a built-in feature to achieve this consistently. I resolved the issue with a concise script.
#Requires AutoHotkey v2.0 ScrollLock:: { try { activeHwnd: = WinGetID("A") isTopMost: = WinGetExStyle(activeHwnd) & 0x8 ; 0x8 = WS_EX_TOPMOST WinSetAlwaysOnTop(!isTopMost, activeHwnd) SetScrollLockState(isTopMost? "Off": "On") ToolTip("Always On Top: "(isTopMost? "OFF": "ON")) SetTimer(() => ToolTip(), -1000) } }
This script effortlessly elevates a selected window to always on top, with a visual indicator to confirm activation. The Scroll Lock key offers an unobtrusive method since it’s infrequently utilized.
1 Preventing Your Computer from Sleeping

While downloading large files, I’ve found my computer’s sleep mode interrupts the process, causing frustrations. To combat this, I devised a script to disable sleep mode using Ctrl + Alt + Shift + S.
#Requires AutoHotkey v2.0 #SingleInstance Force global on: = false, endTime: = 0 ^!+s::{ global on, endTime if! on { hrs: = InputBox("Enter hours (0 = infinite):", "Anti-Sleep").Value if! IsNumber(hrs) || hrs < 0 return MsgBox("Invalid input.") endTime: = hrs? A_TickCount + hrs*3600000: 0 SetTimer(AntiSleep, 300000), SetTimer(CheckEnd, 1000), on: = true ToolTip("Anti-Sleep: ON"(hrs? "`n"hrs "h": ""), 500, 500) SetTimer(() => ToolTip(), -1500) } else { SetTimer(AntiSleep, 0), SetTimer(CheckEnd, 0), on: = false ToolTip("Anti-Sleep: OFF", 500, 500) SetTimer(() => ToolTip(), -1000) } } AntiSleep() => (MouseMove(1, 0, 0, "R"), MouseMove(-1, 0, 0, "R")) CheckEnd() => endTime && A_TickCount >= endTime && Send("^!+s") ^!+x::Send("^!+s")
This script operates by simulating minor mouse movements at regular intervals to prevent my PC from entering sleep mode. An added feature allows deactivation after a predetermined period, accompanied by a tooltip for status updates.
Embarking on scripting may appear daunting, but you don’t need to fully grasp each code line to gain its benefits.Get AutoHotkey and begin with one or two scripts that address your specific needs. As your confidence grows, incrementally integrate more scripts to refine your workflow further.
Frequently Asked Questions
1. What is AutoHotkey and how can it improve my productivity?
AutoHotkey is a powerful scripting language primarily designed for automating tasks on Windows. By creating personalized scripts, you can enhance your productivity by eliminating repetitive actions, customizing keyboard shortcuts, and streamlining workflows, enabling you to focus on important tasks.
2. Are AutoHotkey scripts difficult to learn?
While the syntax may appear challenging initially, AutoHotkey is user-friendly, offering extensive documentation and community support. Starting with simple scripts will help build your confidence, allowing you to progress to more advanced scripts as you become more comfortable.
3. Can I customize AutoHotkey scripts for any application?
Yes! AutoHotkey scripts can be customized to work with virtually any application. You can create shortcuts and automation for specific programs, making it a versatile tool for enhancing efficiency across various tasks. The flexibility of AutoHotkey means that the only limit is your imagination.
Related Articles:

Essential Command-Line Tools for Windows PCs: My Top 4 Picks
11:41
Transform Your Android to Look Like Windows XP with This Brilliant Free Launcher
11:33
Incredible Features of Microsoft’s Windows Terminal Update
11:26
Leave a Reply