
Guide to Outer Dungeons in Digimon Story: Time Stranger
Delve into the digital universe of Illiad, a captivating realm where Digimons thrive amidst daily struggles, training for impending battles, and sometimes facing unfortunate demise. Their vibrant habitat adds depth to this gaming experience.
To fortify their defenses against adversaries, Digimons can seek out the Outer Dungeons, which present various challenges designed to enhance their combat prowess.
Upon entering Illiad for the first time, you’ll discover that these Outer Dungeons manifest throughout the game, both in the Digital and Real Worlds, often concealed behind destroyable barriers or hidden alcoves.
This comprehensive guide will outline the locations of all Outer Dungeons in Digimon Story: Time Stranger and offer strategic advice to conquer them.
Note that these dungeons will be presented in the order of discovery, regardless of difficulty or nomenclature, allowing you to utilize this reference throughout your journey.
Rewards from Outer Dungeons

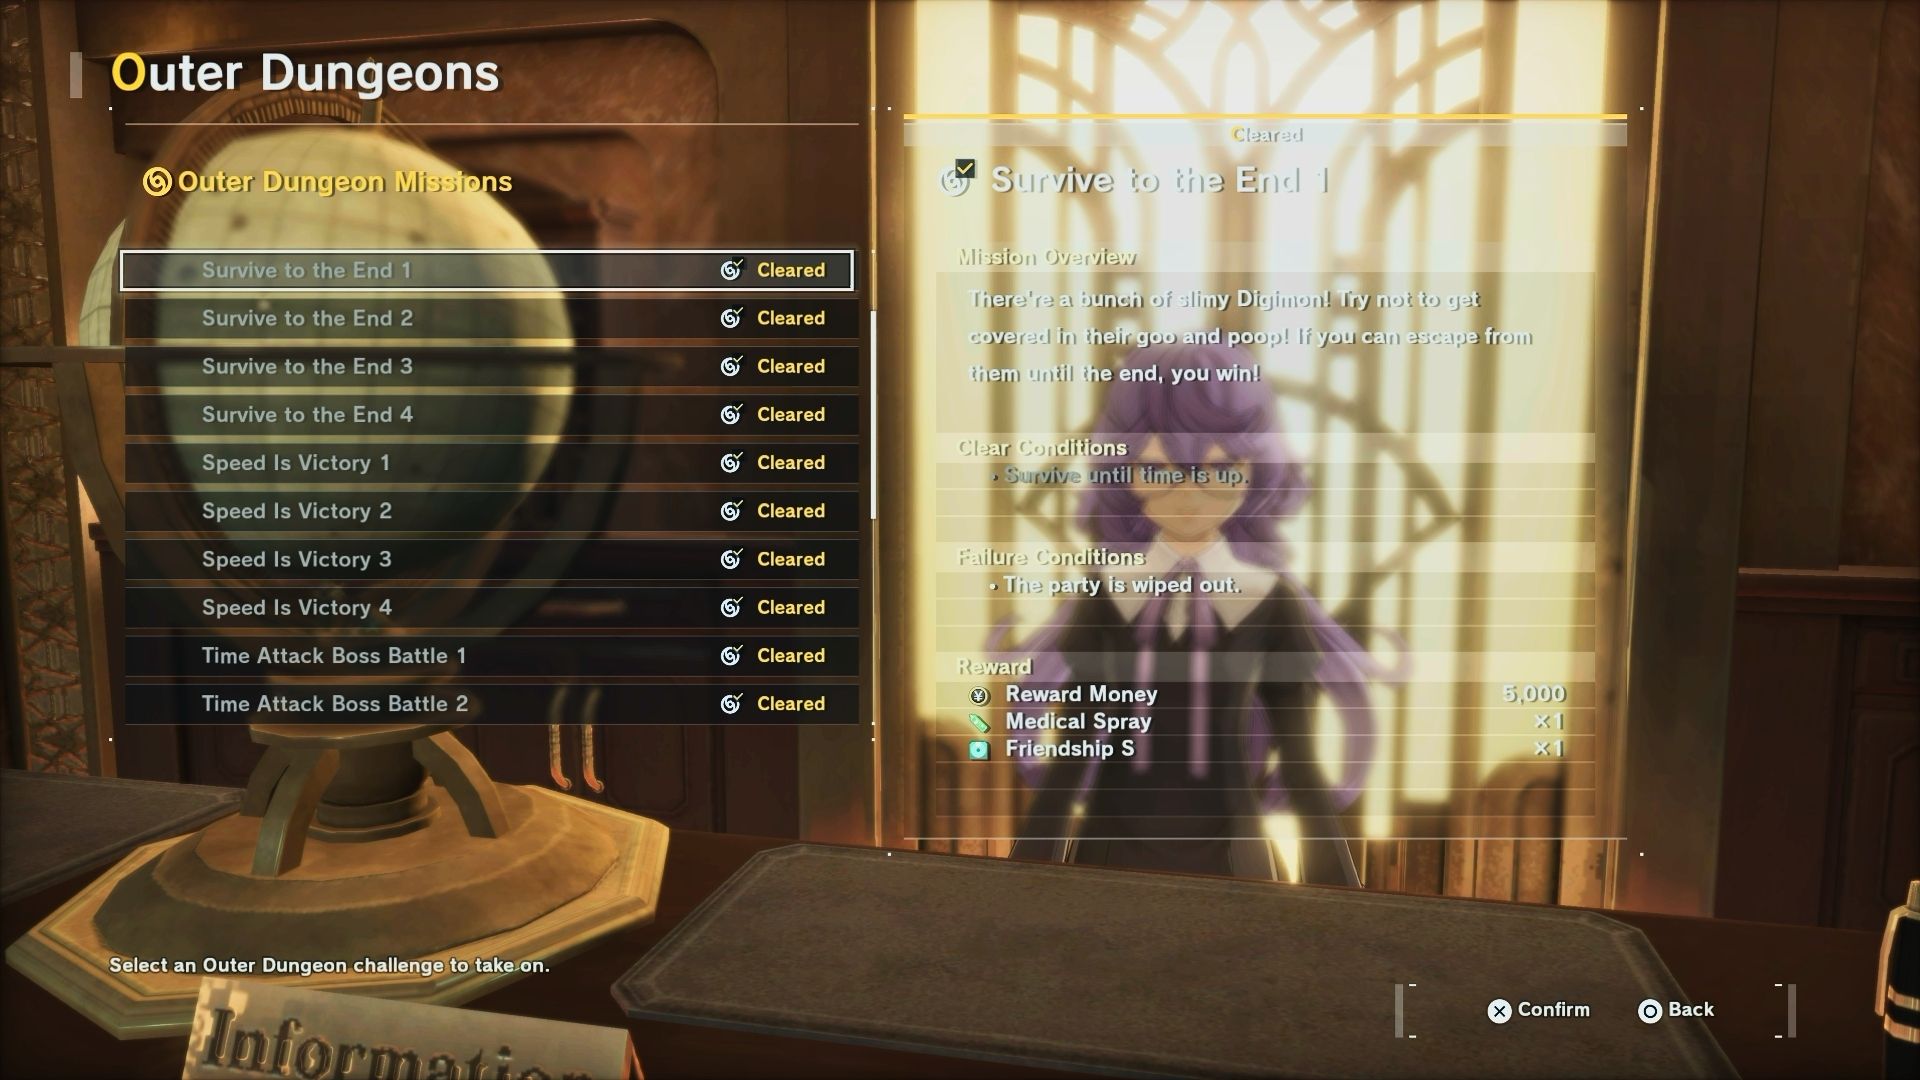
There are a total of 20 Outer Dungeons categorized into five distinct types, each with varying difficulty levels displayed by numbers in their titles.Completing an Outer Dungeon rewards you with currency, alongside useful items like Medical Spray and Friendship points.
Significantly, the initial completion of each dungeon awards you a unique Digimon. While these may not rank among the strongest, the rank 4 dungeons yield a level 60 Mega Digimon, which is an impressive addition to your roster. Interact with their pixelated form displayed on screen for your reward.
Furthermore, each dungeon includes a special challenge that, when accomplished, grants a Talent Awakening Booster and a note from the developer behind the challenge.
Upon mastering every Outer Dungeon in a series, you receive a Mysterious Device in various colors. Initially, I speculated this could lead to secret digivolutions, but it merely serves as decorative items for your DigiFarm.
Additionally, two achievements can be earned: The In-Between Explorer for discovering all Outer Dungeons and Problem Solver for completing all of them.
Quest: Protect the Giant Digimeat 2
Location: Odd Underground Passage
Upon defeating Titamon, you’ll be transported via a portal to the Odd Underground Passage.Instead of following the main pathway, navigate left at the first corner and destroy the debris using a Digimon.
This area contains your first Outer Dungeon, which is hard to overlook. Should you miss it, descend the stairs at the southernmost point of Central Town to return to the underground path.
Equip your party with Data-type Digimons to tackle 30 Vaccine foes, preventing them from reaching the meat. Utilize DigiAttacks to defeat them, unlocking this dungeon’s bonus item and dev note.
Challenge: Fight the Ultimate Digimon 1
Location: Central Town
Upon entering the sewers of Central Town, take an immediate left to smash the iron barrels. Breaking these will reveal the Fight the Ultimate Digimon Outer Dungeon.
This challenge involves battling three varied Digimons based on your selected path. You can preview which enemies you’ll encounter, so prepare a team that counters them effectively before commencing, as party changes are not permitted post-entrance.
To access the message and bonus loot, you’re required to collect +10 Marks of Mastery—a detail that may seem vague but connects to the shared requirements across this dungeon type.
Defeating each enemy grants a respective trophy, meaning Marks of Mastery are essentially trophies. With a tally of 14 possible trophies per Ultimate dungeon trial, you can accumulate a maximum of 14 Marks of Mastery through your strategic successes.
To meet the unclear expectations set by the dungeon’s creator, either complete all routes or simply defeat at least 10 Digimons per dungeon.
Challenge: Fight the Ultimate Digimon 3
Location: Central Town
As you unfold the storyline in Central Town, be directed towards Central Tower. Instead of heading straight there, veer to the right after exiting the pub to discover a staircase that was previously blocked by a Guardromon.
Head up the staircase where you will find some boxes to smash using DigiAttacks. Once destroyed, you will uncover this Outer Dungeon.
This dungeon mirrors previous ones, requiring you to face a gauntlet of three enemies along different pathways. Choose wisely; once you commit to a path, you cannot revert. Optimal strategy fosters a single-type team targeting enemies with complementary weaknesses.
However, this dungeon poses a steep challenge early in the game. Item usage is forbidden, and standing still offers no respite—resulting in potential quick defeats. Interestingly, the second dungeon appears skipped, as you move directly to this third one.
The requirement of over 30 Marks of Mastery for bonus content unfortunately cannot be achieved until you locate the missing second dungeon.
Challenge: Speed is Victory 2
Location: Factorial Town
Your journey progresses to Factorial Town aboard the massive Blimpmon. After discussing matters with Guardromon, head upwards until you encounter another Guardromon, who complains about the Locomon malfunctioning.
Next to this Digimon, you will find a destructible object. Break it to unveil the Speed is Victory 2 Outer Dungeon, marking your inaugural Peckmon racing experience.
To enter the race, purchase a Vade Pass for 5000 Yens from the notoriously cheap Vademon within the dungeon. Once engaged, your goal is to collect the meat while steering clear of obstacles. It can be entertaining—perhaps not as much as one would hope.
Returning to the Lobby will yield a refund of your Vade Pass as the event resets.
Completing the race without colliding with any opponents or obstacles rewards you with the sought-after message and bonus item.
Challenge: Speed is Victory 1
Location: Factorial Town
Another racing Outer Dungeon awaits the adventurers, much to the delight of all Adamant agents.As you navigate the Factorial Area, post assisting Kokuwamon with batteries, keep an eye out for this race challenge.
This dungeon is easy to locate as it’s situated beside an Eebemon shopkeeper. Should you require additional guidance, the screenshot provided serves as a reference.
Being a Speed is Victory dungeon, your mission remains unchanged: race with a Peckmon, evading any obstacles and opposing Digimons to secure the message and bonus item. Being the first in this series, it presents a simpler challenge than its successor.
Challenge: Time Attack Boss Battle 2
Location: Abyss Beach
Your adventure will eventually lead to a vacation-esque sequence filled with battles at Abyss Beach. When reaching Ocean Village, instead of advancing in the story, swim westward.
Upon entering the water, you’ll notice the entrance to the Time Attack Boss Battle dungeon nestled within an alcove.
True to its name, you must defeat the boss within a set time limit—a generous allowance of 3 minutes. The timer pauses while you engage in battles, allowing you to gather treasure before facing the main boss.
Unlocking the message and bonus item hinges on defeating 10+ opponents with a single DigiAttack. Expect to face common foes like Butamon, Gomamon, Coelamon, and a single Shellmon as the boss, leading up to Ikkakumon.
- Utilize Data Digimons with Electric attacks against Gomamon and Ikkakumon.
- Employ Virus Digimons with Ice and Electric attacks to counter Coelamon and Shellmon, respectively.
- Shellmon, a Data type, is weak against Electricity.
- The simplest path to fulfilling the unlock criteria is to target Butamon, who are abundant and easy to defeat, especially at the beginning.
Clearly, it’s time to bring forward those ten in-training Digimons for a viable encounter. These strategies are applicable for all subsequent Time Attack Boss Battle dungeons.
Challenge: Fight the Ultimate Digimon 2
Location: Gear Forest
While navigating Gear Forest, filled with grappling vines, you’ll witness a heartfelt exchange between Hawkmon and Floramon. Instead of pushing forward, swing to the left using a vine as shown on the map.
Continue onward, collecting treasures until you arrive at a platform near the entrance where this Outer Dungeon awaits.
This dungeon follows the familiar pattern of facing three Digimons, only this time, it’s easier due to it being the second iteration. Strategize by identifying the toughest Digimon along each path, as they serve as the primary target.
To unlock the related message, you need to gather 20 Marks of Mastery, symbolic of your triumphs over enemy foes.
Quest: Protect the Giant Digimeat 1
Location: Gear Forest
Upon reaching the quaint Gear Forest Village, explore the northern region where a hidden Outer Dungeon awaits, tucked next to a card battle challenger under a pillar.
This marks the beginning of the Protect the Giant Digimeat series (albeit in a confusing sequence).To unlock the message, impede every single Digimon using only DigiAttacks—eschewing turn-based combat.
This challenge is straightforward; remaining vigilant and pressing the trigger swiftly should suffice for an easy completion, provided your setup is intuitive.
Challenge: Time Attack Boss Battle 4
Location: Gear Forest
Exit through the southern entrance of Gear Forest Village into an adjacent forest area, where a grabbable vine conceals another Outer Dungeon guarded by a MegaKabuterimon.
Without grinding beforehand, this Outer Dungeon may prove exceedingly challenging to conquer. Expect to encounter a swarm of Kabuterimon, Kuwagamon, MegaKabuterimon, Okuwamon, culminating in a battle with TyrantKabuterimon.
Focus on assembling a balanced squad with both Vaccine and Data Digimons, infusing some bug spray—figuratively speaking.
Even basic foes like Kabuterimon may be formidable at this stage. I returned later equipped with Mega Digimons, especially as the unlock message demands defeating 10 opponents using DigiAttack.
Upon return, prioritize:
- Vaccine Digimon imbued with Fire skills, complemented by a Data Digimon equipped with Electric attacks to dismantle Kuwagamon and Okuwamon efficiently.
- When facing the boss, collection of Vaccine Digimon manifesting Water or Ice skills is advisable.
For message unlocking, focus on toppling Champion-level Digimons. It may be tough, yet feasible. While these messages yield Talent Booster Awakening items and trivia, their necessity remains debatable.
Challenge: Survive to the End 2
Location: Shinjuku
Re-entering the human world reveals a chaotic Shinjuku, and it becomes your mission to defend it. Post repair work in the underground generators, you will return to the Marunosaka Line station.
This Outer Dungeon is situated inconspicuously near your objective; interact prior to acquiring the tool to add this survival challenge to your roster.
Your endeavor is purely to endure for 95 seconds, with the timer suspended during battles. To unlock the message, evade any preemptive strikes from foes.

With Digimons such as Botamon, Greymon, and MetalGreymon, selecting Data types is beneficial. I recommend positioning yourself in a corner to reduce the risk of becoming overwhelmed.
Challenge: Speed Is Victory 3
Location: Abyss Beach (Present Day)
Upon arrival at Abyss Beach in the present timeline, locate the western ladder unseen previously.
Ascend, destroy the obstacle, and enter a cave that leads to a higher level housing this Outer Dungeon. Unfortunately, this dungeon follows the Speed Is Victory format. Angemon, where art thou?
Your task remains to finish the race. By steering clear of any collisions with Digimons or obstacles, the reward of message and bonus item is yours to claim.
Notably, this iteration features stationary obstacles instead of rushing Digimons, making it easier to identify movement patterns. The increased difficulty requires aggressive maneuvers to secure victory against Wingdramon.
Challenge: Survive to the End 3
Location: Abyss Beach (Present Day)
While journeying beneath the Abyss Sanctuary, deviate from the central path to pursue an eastern route that leads south to this Outer Dungeon.
This is the three-star difficulty level of Survive to the End. Expect encounters with Crabmon, Shellmon, Gekomon, WaruSeadramon, and ultimately Sharkmon.
Employing my corner strategy once more, I only engaged while being attacked—successfully surviving the challenge with minimal conflict.
Challenge: Survive to the End 1
Location: Shinjuku (Present Day)
This Outer Dungeon is accessible near the alley adjacent to Inori’s domicile, available only upon returning to the city after navigating through Gear Forest.
Having returned to Shinjuku in search of Little Bearmon, an alleyway that was previously impassable will now lead you to Survive to the End 1 dungeon.
If you’ve completed previous challenges, this one is a breeze. I continued my corner strategy while retaliating against any attackers.
Challenge: Time Attack Boss Battle 1
Location: Akihabara (Present Day)
Following the trend of the previous Outer Dungeon, seize the opportunity to investigate Digimon-laden Tokyo.Search for this Outer Dungeon nestled in an Akihabara back alley.
Despite potential availability earlier, it seems imprudent to discuss the third Time Attack dungeon before the first one.
Travel home and step into the streets. On the right side near your house, you’ll spy some trash bags; smash them using your Digimons to unearth this Outer Dungeon.
While strategic patience may see you succeed against the boss, your existing strength might not allow for defeating Digimons with single DigiAttacks yet—I surely wasn’t capable. I managed to conquer the boss, MetalTyranomon, easily after bringing powerful Megas to the fray against those Rookies.
Challenge: Time Attack Boss Battle 3
Location: Shinjuku (Present Day)
Although this Dungeon might be accessible prior to Akihabara’s, the game’s listing is somewhat confusing.
If you venture home and exit into the streets, you’ll spot some trash bags to the right of your house. Destroy them to reveal this Outer Dungeon.
Defeating the boss is feasible with sufficient strategy and patience, but your current combat power may hinder your capacity to eliminate foes with a single DigiAttack. At that time, I was not adequately equipped.
Expect opponents at level 46, ranging from Agumons to Dracomons. My tactical advantage came when I waited until I had Megas on my team to unleash a series of destructive DigiAttacks against those Rookies.
Challenge: Speed Is Victory 4
Location: Paradise Coliseum
While I enjoyed my escapades through Illiad, the discovery of Speed is Victory Outer Dungeons drained much of my enthusiasm.
This dungeon is located within the Paradise Coliseum in the Factorial Area. You’ll encounter it during your journey, so only the most oblivious players might miss it.
Similar rules apply as the challenges before—navigate the race without colliding with obstacles or Digimons. This course is notably more complex and demanded a substantial time investment to conquer without missteps.
By maintaining constant boosts through hearty meat consumption, you’ll find success is attainable. However, prioritize avoiding collisions with moving Digimons; one lost piece of meat is less trouble than a setback caused by a crash.
The rewards enjoyed here are substantial; aside from currency and items, you’ll also receive a level 40 MagnaGarurumon upon successful completion.
Quest: Protect the Giant Digimeat 3
Location: Dark Castle
Your journey through the tedious Dark Castle where Gekomon appears repetitively will ultimately lead you to another zone.
Progress along the designated route until reaching a northeastern area, the second-highest point on the map. Speak with Gekomon and select, “We should all learn to give rather than take.”
This action transports you to a northern area that confers access to this Outer Dungeon. It’s time for another round of protecting the giant digimeat, so recollect that you must halt Digimons from breaching the defense perimeter.
To reveal the message, avoid direct combat entirely. You must vanquish all Digimons utilizing solely DigiAttacks.
- Expect a mix of Vaccine, Data, and Virus types, most of which are vulnerable to Fire, excluding Dracmon, who is susceptible to Wind and Light.
- The Bakemon soaring above can be particularly aggravating. The only way to conquer them is by climbing up or waiting for them to descend close to your Digimeat.
- Concentrate on downed enemies and Phantomon, as they will follow you aggressively. Though SkullMammothmon presents strength, he’s slow, so employ caution.
- Keep an eye on your map; anytime you see a Bakemon approaching, rush to intercept. They’ll descend, giving you the chance to strike with your Fire-type Digimons.
Challenge: Survive to the End 4
Location: Heat Cosmic
As you traverse through this searing terrain, your path will be obstructed by bubbling rocks. Pumpkinmon will inform you that a Chill Seed is essential for proceeding—leading you up an elevator.
Upon reaching the top, continue your journey; however, turn after navigating a round platform and instead of heading east, break some rocks in the northern corner to unveil this Outer Dungeon.
This marks the series’ final Survive to the End challenge, raising the difficulty factor significantly. I’ve found consistent success by eschewing the center to remain in a defensive corner, maintaining my winning streak.
The arena will feature Solarmon, Firamon, and Flaremon—all Vaccine Digimons—alongside a Data Meramon, culminating with a Virus-type Megidramon.
As expected, all foes are water-weak. While they can be subdued, maintain vigilance regarding your SP, as traditional recovery methods are nonviable. The Megidramon can swiftly end your trial if caught unprepared.
Challenge: Fight the Ultimate Digimon 4
Location: Chill Cosmic
Traversing Chill Cosmic will see you sliding through areas while seeking a Chill Seed or conversing with the local boss.Eventually, you’ll find yourself at a three-way junction.
Proceeding straight continues to another zone, while pathways to the sides lead to elevators.Choose the northwestern lift to reach this Outer Dungeon.
Yet, there exists a tactical loophole.With a Megidramon in a mixed-party setup, utilizing Hell Howling—which boasts a 70% chance of inflicting Crystallization—can decisively limit your adversaries’ combat options, easing your victory quest.
Quest: Protect the Giant Digimeat 4
Location: Chill Cosmic
Following your triumph over Dianamon, revisiting Chill Cosmic enables you to return to the throne room for access to Protect the Giant Digimeat 4 dungeon.If you have followed this guide thoroughly, congratulations—you’ve located the final challenge, earning a trophy.
The combat here involves battling Frigimon, IceLeomon, IceDevimon, and Vikemon, necessitating Fire-elemental attacks. Encountering Wingdramons, utilize Earth or Steel types as they struggle against these elements.
Vikemon leads the forefront of this challenge; while appearing intimidating, he is relatively easy to down.
Ultimately, I found this trial to be the most manageable among the concluding tasks. I patiently secured my position at the attack line, vanquishing each Digimon as they approached. Even the Wingdramons failed to flee before I engaged.
DLC Outer Dungeons
Available exclusively through DLC purchases, the following Outer Dungeons accelerate your progress towards earning experience, currency, or materials.
While not mandatory for enjoying the game, acquiring them may significantly enhance the efficiency of your play—especially useful for mission guides like this one.
Engagement with enemies present in the field is often more fruitful than handling battles, as they spawn continuously.
The Hall of EXP
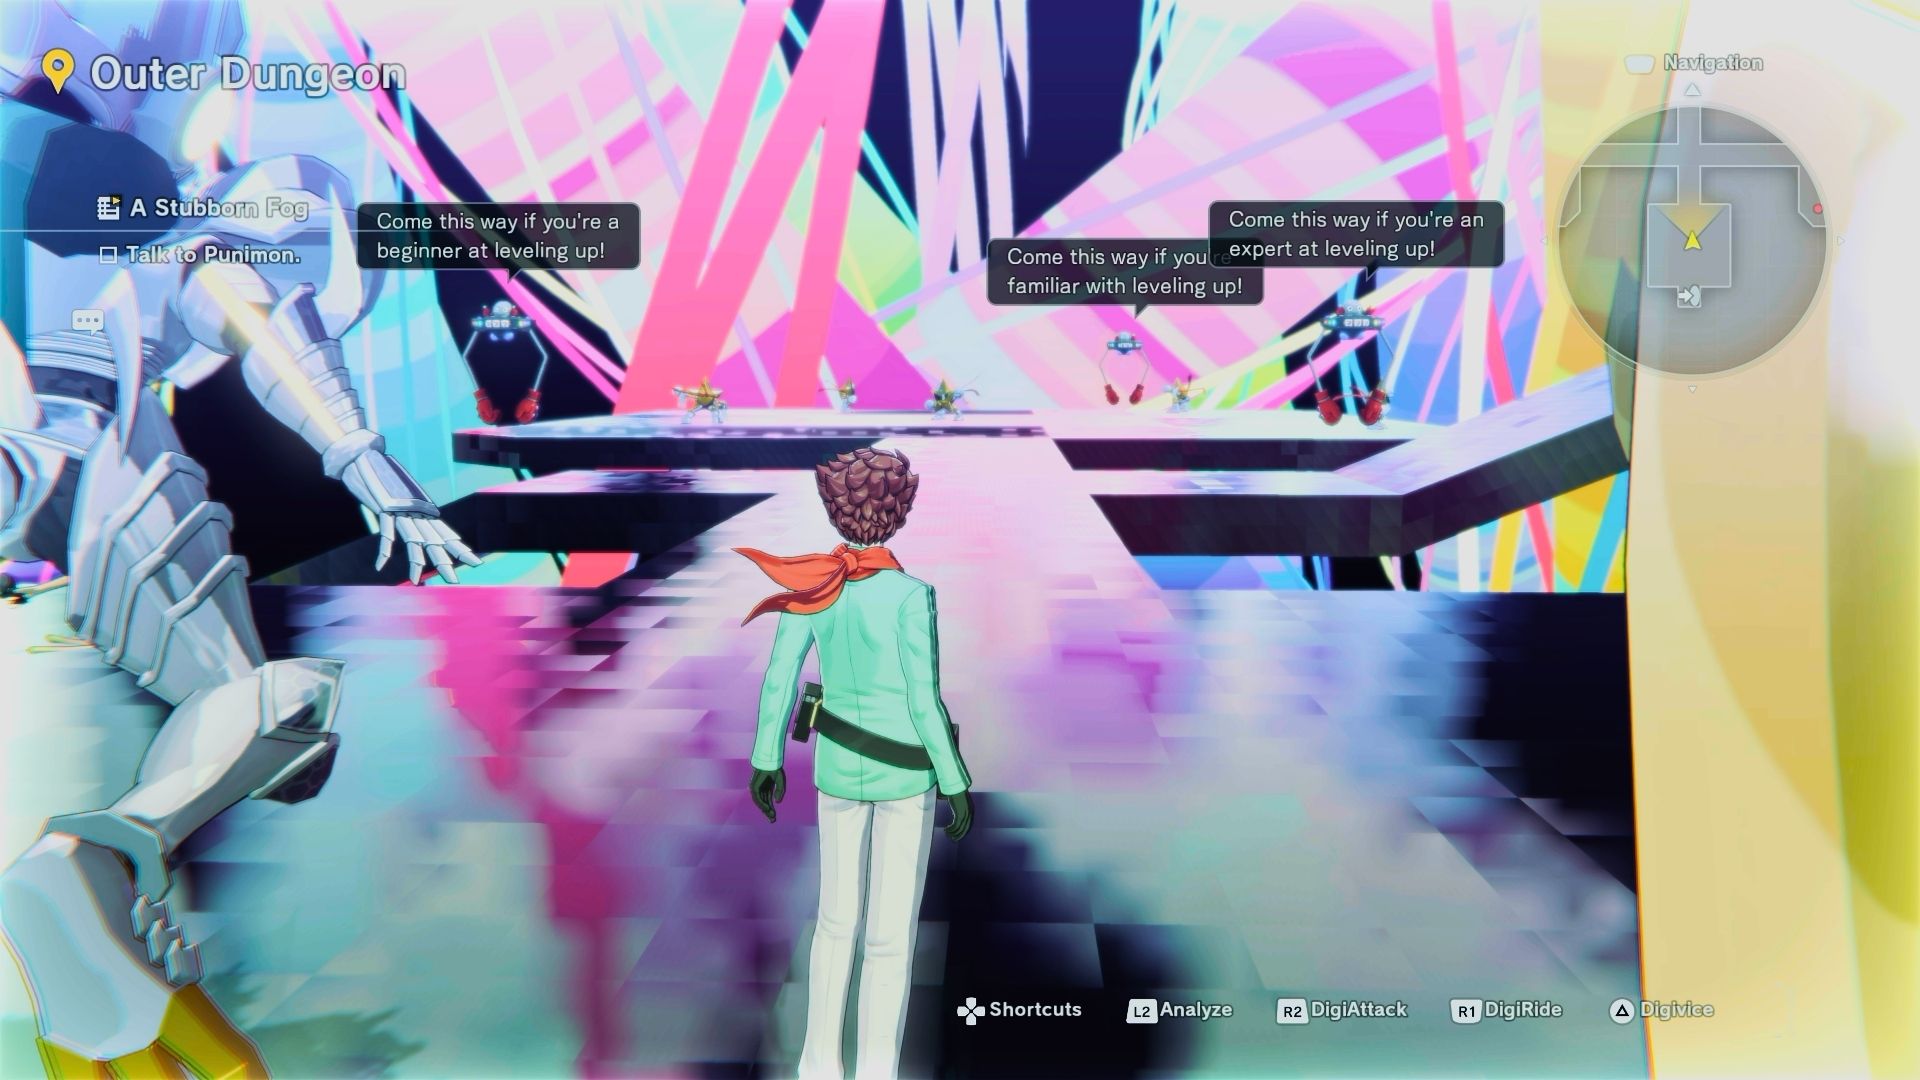
The Hall of EXP presents three distinct paths: beginner, intermediate, and advanced. Beginners will find Choromon, whose defeat yields Courage Point II, rewarding 10, 000 EXP to a given Digimon.
The intermediate challenge introduces PlatinumNumemon, which can be efficiently taken down by Champion-rank Digimons. Victory will grant Courage Point IV, translating into a generous 50, 000 EXP bonus.
Finally, advanced participants will face MetalEtemon, the hardest challenge. This arena is intended for maxing out Mega Digimon levels, awarding Courage Point V, a whopping 100, 000 EXP.
The Hall of Gold
The Hall of Gold mirrors the structure of the EXP arena but is focused exclusively on monetary rewards.
In the beginner stage, battling Guardromon will yield 10, 000 Yen. Intermediate challenges against SuperStarmon reward 25, 000 Yen each, while the advanced level culminates in a fight against KingMamemon, handing out 50, 000 Yen upon defeat.
This strategic combination of the Hall of EXP and the Hall of Gold is perfect for grinding your Digimons, as experience accumulation allows them to level while generating currency for repeated training in the DigiFarm.
The Hall of Materials
This arena provides an identical structure, featuring three segments, with each escalating challenge offering improved items.
Beginning battles against Gotsumon and Hagurumon will net materials corresponding to their respective types: Gotsumon yields Gravel Datasets and Rock Model Fragments, while Hagurumon provides iron materials such as the Cylindrical Model.
The intermediate engagement involves Frigimon, dropping crystal materials, along with Raremon, which provides peculiar fluids. In the advanced stage, participants will confront Digimons offering wooden and sandy resources; defeat MudFrigimon for Brown and Gray Textures, and Woodmon for Tree and Leaf Models.


Leave a Reply